Tuesday, September 20, 2011

Of Silk, figs, and Andre


This past Sunday was our 12th wedding anniversary, which is also known as the silk anniversary. I only found out about this via an internet search when a friend asked which anniversary is the 12th. As it happened, one of the presents that I got for hubby is a silk tie, so it’s totally in sync with the theme!


Two days before our anniversary I received a tip from a chef friend that my local supermarket just got a shipment of super sweet Turkish figs. The next morning I rushed over to said supermarket and bought four packets. I love figs, but only if they’re sweet and actually taste of figs. Often times even when they are ripe they have a watered down non-descript taste that won’t excite anyone. These ones were very sweet, with intense fig flavors.

Hidemi Sugino has a fig tartlet that I have never been able to try, because I somehow always go to Tokyo when figs are most definitely not in season, like in the dead of winter. So naturally the first thing that popped into my head was to make the fig tartlets. As far as Hidemi Sugino recipes go, this is one of the easiest ones, all you have to do is to find good figs. For the first time, I’ll share his recipe on my blog with you guys, because it's not too long to translate. You’ll need to either know or look up some of the basic techniques, since I’m too lazy to type it out, but it should be fairly easy to google and find out. So here it goes.

Tartelette aux figues (makes 12x 7cm tartlets)

Pate sucree:
90g unsalted butter at RT
60g icing sugar
30g whole egg
20g almond powder
150g light flower

crème patissiere:

250g milk

55g caster sugar

¼ vanilla bean

50g egg yolk

12g light flour

12g corn starch


Crème d’amandes
40g unsalted butter at RT
40g icing sugar
40g whole egg
40g almond powder

6 large figs

kirsch

30B syrup (130g sugar +100g water)

crème Chantilly

Apricot jam
Raspberry jam


1. Make pate sucree and chill in fridge

2. Make crème patissiere and chill in fridge (steps 1 & 2 can be done the day before)

3. Roll dough out and fit into tartlet pans, rest in fridge while making crème frangipane

4. Make crème frangipane by whisking together crème d’amandes and crème patissiere

5. Take tartlet shells out of fridge, use another tartlet pan to press dough down, then prick with a fork a few times.

6. Pipe about 25g of crème frangipane into each tartlet pan and let rest in fridge for 30 minutes

7. Meanwhile, slice each fig into 16 slices, removing skin only after you’ve sliced them, one slice at a time. This took me almost an hour, but it results in neater outside edges, so it’s worth it.

8. Arrange slices on a tray and sprinkle granule sugar on it (how much sugar depends on how sweet your figs are), then sprinkle with kirsch. Chill in fridge for 30 min

9. Bake tartlets at 170C for about 15-20 minutes, until crème frangipane is a dark golden brown

10. Remove tartlets from pans and cool.

11. Whip up crème Chantilly to very stiff peak. You’ll need about 20g for each tartlet

12. Mix together 20g of 30B syrup, 10g water and 12g kirsch. Brush onto top of tartlet, let syrup soak in

13. Spread a layer of raspberry jam onto the baked tartlet, then pipe a mound of Chantilly on top.

14. Arrange 8 slices of figs in an overlapping pattern onto each tartlet

15. Heat 50g apricot jam and 10g kirsch in a small saucepan until fluid. Brush onto cut surfaces of figs

16. Top each tartlet with a raspberry and you’re done!


We had some of this for dessert the day before our anniversary and gave some away to friends when hubby went to play tennis with them, but our real celebration was the dinner at chef Andre Chiang’s eponymous restaurant Andre. I liked his cooking when he was helming Jaan at the top of Swissotel, but somehow never got around to trying his own place since he opened it about a year ago.  I made the booking more than a month ago because it is F1 week in Singapore and it never hurts to be prepared.

The front of the restaurant was so inconspicuous that I missed it the first time and had to double back and drive down a short stretch the wrong way to get back. Good thing Sunday night traffic is light in this part of the town. The restaurant has the feel of a house. Off to the side on the first floor is a small sitting area, but we were led to the second floor dining room. The space has the clean modern feel of a French house. One side of the wall has black and white wall papers of a little forest, and sheep clad in suede are used as bag stools.


Hubby chose the wine pairing, as it is too tiring to try to pick out wines that will go with most of the eight-course meal, especially since I don’t drink. I notice most other guests opt for this lazy option as well.

Before we start we were treated to a quartet of palate cleansers: “fish and chips”, “popcorn”, some silvery fish slices on a crisp cracker served with porcini chips and Andre’s signature chicken skin chips.

His eight-course menu is based on his “octophilosophy”, the concept of which is highlighted in the link above, so I shall not repeat it here.


The first course is Pure, which was scallop ravioli, chives& dill flower in purple cauliflower consume. Very little seasoning was used and the fragrance of the dill flowers ties everything together nicely.

Next came Salt: French oyster wrapped in Japanese seaweed, served granny smith foam. The dish was decorated with tiny cubes of cucumbers and apples. No salt was added, only the saltiness from the oyster provided seasoning.


The third course was Artisan - Kyoto eggplant topped with caviar, served with a savory crème Anglaise sauce sprinkled with hazelnut shavings and fried burdock roots (gobou). The savory crème Anglaise was a nice twist and the fried gobou brought a nice contrast to an otherwise creamy dish. To top it all off, the dish on which this course was served is designed by chef Andre.


The next course is named South and pays homage to chef Andre’s time spent in the south of France, close to the Mediterranean . It consists of flounder with tomato & white peaches, and tomato sorbet in one dish. Uni risotto and blue crab foam in a second dish. The risotto was probably one of the best I’ve ever tasted, done to perfection with just the right amount of bite to it and is perfectly flavoured with the uni sauce.


Texture came next and is squid "arborio rice" with charcoal rice crackers. The “rice” is actually squid and tasted much better than my chicken substitute. I usually don’t like squid because of the chewy texture, but here the texture is completely changed, and I find myself wishing I had stuck to the original dish.


The sixth course is Unique, and here the unique ingredient is French artichoke. The dish was stuffed baby barracuda, French artichoke and artichoke foam. To be perfectly honest I felt that the artichoke was rather tasteless on its own, however the sauce was so robust and the stuffed baby barracuda so tender that they saved the dish. I just felt that to be THE unique ingredient in the “unique” course, the artichoke should’ve taken a more front row seat.


The next course was “memory” and it was a dish that Andre has always kept on his menu, with different variations. Tonight it’s a baked foie gras jelly with black truffle glaze. The “jelly” contains egg white and has the silky consistency of a well-executed chawanmushi, and the black truffle glaze was so fragrant that even later, when the next table had the dish we could smell it. Although hubby thought it was a great dish and I loved it too at first, ultimately I felt that either the portion was too big, or it needed an accompaniment to cut down on the richness, like a champagne jelly or something similar.

Our final course was “terroir”, although in our case it’s something from the sky: French pigeon with pigeon jus, pea purée & potato gnocchi. I was still recovering from the last dish and found the pigeon a little too gamey for my taste, although to be honest it was a perfectly cooked pigeon, with just a hint of pinkness in the centre, so Hubby was more than happy to finish my portion for me.


Before dessert, we cleansed our palate with mini marshmallow, strawberry granita & yogurt jelly in a cute little pot. Dessert was chocolate sponge, which really looked like a piece of sponge; soft chocolate sphere filled with warm chocolate ganache, and burned butter ice cream. I’ve always found restaurant desserts boring and this was no exception. I think it was my least favourite course of the entire evening, but I guess nobody is perfect.


When my latte came the waitress apologetically said something about “please be careful, the cup is designed by chef Andre and the shape is a little strange” and indeed it was. The cup was more of an irregular rectangle rather than a round, and hubby immediately commented that he could’ve made one just like that. It wasn’t until I picked it up that I realized the bottom was not flat. Good thing I didn’t try to set it down on the table!

We rounded off our meal with some French figs, popcorns that “pop” in your mouth, passion fruit marshmallow and honey hazelnut Madeline. All in all, it was a very memorable meal. I’ve heard mixed reviews about Andre but we felt this was the most exciting meal we’ve had in Singapore in years. I think chef Andre is a creative genius and is really setting new standards for all restaurants in our little dot on the map. So hats off to him!


Saturday, January 09, 2010

The Gingerbread House Chronicle

The first time I attempted to make a gingerbread house was four years ago. I was in Tokyo and going to Le Cordon Bleu. That was also the last winter we lived in Japan. Since then, Christmas seasons had been spent moving, traveling, and being busy with teaching and churning out cake orders. This year, I made a decision to stop teaching all classes one week before Christmas and not to take any orders for Christmas and New Year. This year, Christmas was to be spent cooking for friends and family.

Ever since the success of my first gingerbread house, I’d been itching to make another one. Living in hot and humid Singapore, however, presents its challenges. With the humidity level constantly hovering around 90% , everything turns soggy so a gingerbread house will no doubt collapse within hours of being constructed when the walls absorb moisture and give in to the weight. Two years ago I made a gingerbread tree with the yummiest, most buttery recipe I’d ever tried, but making a gingerbread house with that recipe is out of the question.

After some research I found two “structural” recipes. They are supposed to be very sturdy and humidity proof. In the end I chose one that had very simple ingredients because the alternative is one that contains honey, which is bad news because the house will be an ant magnet.

Time spent searching for recipe: 2hrs

Once the recipe is chosen, the next step is to finalize the design of the house. The cottage I built in Tokyo was cute, but for my second house, I had grander plans. I wanted Victorian, with two sections, a bay window, and maybe a porch. I found a basic template on the internet but to make sure everything fit, I cut out some foam boards and fine tuned the design. The pitch of the second roof that joins the main roof proved the most troublesome. I knew I should’ve paid more attention in three-dimensional geometry, but who would’ve thought you’d need that for anything, let alone baking? After endless tweaking, the roofs finally fit together, but I made the executive decision to forgo the porch this year. After all, I need to keep something for next year, don’t I?

Time spent building and fine-tuning the foam model: 4 hrs

Just like landscaping is an integral part of building a real house, some thoughts need to be put into building a garden for the gingerbread house. A snowman is a must, of course, and since the house will sit on a big board (13”) there’s space to place a girl making a snow angel, plus Princess Libby doing a doggie angel in the snow. But why limit yourself to just outside the house? Since I had all those big windows, I made a Christmas tree for the living room too.

Time spent making fondant figurines and ice-cream cone trees: 4 hrs

At this point, I was spinning a little out of control. Never mind I had no idea just exactly how sturdy this supposedly “structural” recipe is, and whether it can really stand up to the Singapore humidity, I must have light in the house! Here is where I ran into some trouble. You see, once upon a time in high school physics, I clearly recall yours truly wiring light bulbs and building circuits, but that part of my education must’ve been permanently deleted from memory. It didn’t help that there’s no true DIY stores like Home Depot back home, so I wasn’t able to find any electrical wires even if I were capable of wiring the house. Dear hubby, whose Electrical Engineering degree from M.I.T. had been collecting dust since the day he graduated, offered this when I asked how come he could once build a robot but now can’t even wire my house: “Do I look like an electrician to you?” Plan B: I bought a mini flashlight to be stuffed inside the house through the doggie door in the back. Whatever works, right?

Time spent pondering the myriad of products on display at Home Fixe and other DIY stores: 30 minutes


Baking the cookie pieces with this recipe was so easy. Since there’s no baking soda or powder in the dough, whatever shape I cut out, baked the same exact shape after it came out of the oven. There was no need to trim after baking!

Time spent baking: 3 hrs


After baking the cookies, I let them rest overnight in a spare bedroom with a dehumidifier running before decorating them. The one lesson I learned from making my first house: it’s much easier to decorate the walls and windows BEFORE you put them up. I had a lot of fun dreaming up how the house should look. I knew I didn’t want a childish rendition, but I also didn’t want a pure brown and white house, so I went with a classic look. I knew I wanted windows this time, but didn’t want to melt candies inside the window holes (again, fear of ants), so I used gelatin sheets instead. Simple! To decorate the roof, I decided not to cover it with candies or cookies. I was afraid that the added weight would cause the walls to buckle, so instead I piped snow “garlands” and small designs inside. The inspiration was from a flickr member’s gorgeous gingerbread house designs, and it worked out well. Another decision I made was to not leave the back wall blank, because, even though nobody will look at the back, I thought the back deserves some attention too. Since I’m planning to have Santa stuck upside down in the chimney, I thought I’d pipe Santa’s sleigh and his reindeers on the back wall, to make it look like they’re waiting for him. To fill up space, I also did a Star of David, and a doggie door through which the light source is to be stuffed inside the house to light up the rooms.

After decorating the pieces, however, I was horrified to find some of the cookie pieces starting to sag. NOOOO!!! The culprit, after I calmed down to find cause, was the flooding of royal icing. The extra water used to thin out the icing was absorbed by the cookies and made them soft. Horrified that I may not have a house after all, I laid out all the pieces on cooling racks and placed them into the spare room, with not one but TWO dehumidifiers running around the clock. I went to bed with my fingers crossed, hoping the pieces would dry out the next day.

Time spent decorating cookie pieces: 7 hrs

D-Day: will the house stand up or will it collapse? Holding up the walls with royal icing was very easy, but you know sometimes you have this nagging feeling but couldn’t really put your finger on it? For days I’d been thinking the position of the doggie door was weird, but didn’t know why I thought so. Then it came the time to put up the back wall, where I painstakingly piped Santa’s sled plus reindeers, along with the beautiful Star of David that almost caused the wall to collapse, and it hit me! I had forgotten to flip the template when I cut out the back wall, so now, all the piping details are INSIDE the house! I was so sad I could’ve cried, but construction must go on. Besides this major blunder, the only other minor hiccup encountered was that after putting up a weight-bearing support wall between the two parts of the house, I realized that I needed a hole in that wall for the light to shine through, because (didn’t I say the position of the doggie door was bothering me?) the doggie door where the light was going to be pushed in was on the other side of the house! So that wall quickly came down and I managed to saw an opening in it. Boy, now was the first ray of hope that this house just might stand up after all, because that wall was so tough to cut through!

After I had gotten over the trauma of the inside-out back wall, I started to enjoy the process of putting all the pieces together. I took one last look at the Star of David that is now a wall mural for the living room, and placed the roof on. Now it’s looking like a house! Even with all the tweaking and fine tuning, the two roofs still didn’t fit exactly, but the beauty with gingerbread house is that you can fill up any holes with royal icing and call it snow! I know I did a lot of planning for this house, but this is where I improvised. I added candies to the bay window roof, made extra bushes with gummy candies, put down a Quaker oat square doormat, and placed a pretzel fence around the house. I was having so much fun it was hard to stop adding stuff to the house!

Time spent assembling the house: 2 hrs

So there you have it, the gingerbread house that cannot be eaten and has to live in the spare bedroom where the humidity level is maintained at 50% by two very hard-working dehumidifiers. It did sit in the living room front and center during my dinner parties and will go to Palate Sensations for a photo shoot. After that, it will live in the reception area of the school until the humidity gets the better of it.

Until next year!

Monday, August 31, 2009

DIY Pastry Tool

Tiramisu is one of my favorite desserts to make, be it the traditional coffee kind or my own green tea version. I also like to make a stenciled pattern on top with icing sugar, after the coco powder or green tea powder, to give it a little something extra.

In the past, I've always had to ask someone to help me with this taks, either to hold the stencil or to do the dusting. The problem with that arrangement is that most people who are not pastry chefs, or surgeons, don't have steady hands. My helper gets really nervous when I ask her to hold the stencil just above the cake, without either touching the cake or moving the stencil. Her hands end up shaking violently. But when I asked her to do the dusting while I hold the stencil, she ended up dumpling mounds of sugar in some places and skipping other areas altogether. Trying to point her to the right direction without moving the stencil was next to impossible because you essentially have to hold your breath in order not to move the stencil. The husband faired slightly better but he's not as readily available.

Months went by where I had to put up with substandard stenciled pattern. Then I remembered one of my pastry students who always commented that there should be a tool for every pastry need. I started looking around the kitchen for something that can be turned into a tool to facilitate this particular pastry task. Lo and behold, the toasting rack for the microwave oven!

I attached three binder clips to the stencil, then attached the clips to the three legs of the rack with rubberbands, adjusting the length of the bands by wrapping them around the legs so the stencil would be suspended at the right height. I then carefully slid the tiramisu under the stencil and Voila! A DIY stencil sling!


Is it too premature to apply for patent?

Wednesday, June 17, 2009

How to Convert Your Friends into Twilight Fans

Like I said, I’ve turned into a Twilight fan. For three weeks after I came back from New York, I lived and breathed the Twilight saga, reading the books over and over again, watching the DVD, listening to the soundtracks, and searching any Twilight related video clips on YouTube. Yeah, I know, it’s all a little bit obsessive. The worst part though, is that I don’t have many friends who’ve read Twilight, it being a teen novel and all, which made it hard to share my obsession. So, what’s a girl to do, but to try to convert all her friends into fans, just like her? And what better way to do it than to throw a Twilight-themed girls’ night complete with a screening of the movie?

Here’s what you do:

Step 1: send invitation to all your girlfriends regardless of whether they’ve read Twilight or not. After all, the goal is to have as many of your friends as possible with whom you can discuss and obsess over Twilight together, so new blood (no pun intended) is crucial.

Step 2: get your friend who owns a cooking school to send her chef to cook the “bloody” feast for you. Who can resist a gourmet meal cooked by a handsome chef? So he’s no Edward Cullen, but in real life we have to make do.

Step 3: fill your place with as much greeneries as you can so it resembles Forks, the little town the book is set in that’s perpetually green and luscious.


Step 4: conjure up the idea to make a cake that look like Edward’s meadow and reincarnate Edward and Bella in fondant, despite the fact that you’ve never made any human figurines out of fondant before and that fondant literally melts in Singapore’s heat and humidity. To quote Edward, “Mind over matters.”


Step 5: play the soundtrack and Debussy piano music to set the mood.

Step 6: details, details, details. This includes the red apple, which is on the book cover, and represent the forbidden fruit; flowers that smell good and aroma candles to simulate Bella’s floral scent; drinks that look like blood, such as sangria and watermelon juice; and last but not the least, dress up in your vampire chic best! You want to make Alice proud.


Step 7: channel Siobhan’s ability so you can will it to rain after three straight weeks of sunshine and scorching heat. It wouldn’t be Forks if it weren’t wet and gloomy!

Et Voila! You have yourself a bloody good time with friends and virtually all of them are now converts. The next time you throw a New Moon party, nobody will be going, “Aren’t vampires supposed to kill people?”

Sunday, June 14, 2009

Confession of a Twilight Fan

It all started on a long-haul flight from Tokyo to New York city. I already had plenty of sleep from Singapore to Tokyo so I was wired. After watching Gran Torino and Benjamin Button, and even a stupid Jim Carrey movie called the “Yes Man.” I was left with either watching a LOT of Clint Eastwood oldies or the teen vampire flick Twilight. Don’t get me wrong, I love Clint Eastwood in his early days, before he got all wrinkly and grey, but I wasn’t in the mood for a dirty Harry marathon, so Twilight it was.

And THAT is how I became a fan.

I’m still trying to figure out exactly what it was that grabbed me so forcibly, despite the postage-stamp sized monitor. It was as if I could physically feel the pain and torture that Edward and Bella were going through, never mind vampires don’t exist in real world and I’d never had the slightest interest in any vampire-related subject before.

When I reached NYC, I brought up the subject with my friend C, who happened to be a Twilight fan. She said she read all four books in four days, and went back to read them again the minute she finished. My interest was piqued and I contemplated reading the books as well.

A few days later, I met up with two other friends J and M, who are familiar with Twilight (maybe familiar is to put it mildly). J was so engrossed in the books that she spent an entire weekend in Bali, at a nice resort, doing nothing but reading the books one after another, completely ignoring everything else. She even confessed to pulling into an empty parking space once she was back in Singapore, in order to finish the last book before she went home, where she couldn’t ignore her duties as a mother.

By this point I had already bought the first two books and was waiting to finish another book before embarking on this surely to be addictive and all-consuming journey. Sure enough, once I started reading I simply couldn’t stop. It wreaked havoc on my biological clock, having just gotten over the jetlag from the trip to New York, I now voluntarily turned my schedule upside down again, for Edward.

It took me longer to read the books than my friends said it would, mainly because the story line was so gripping that I found myself skipping ahead, just a few paragraphs down the page, to find out what happened, before returning to the earlier part and read through the whole thing again. So in essence, I was reading the book twice as I go along.

A week later, I emerged from the fantasy world of vampires and werewolves, but I wanted more. So I read Midnight Sun as well, on Stephenie Myere’s website. After that, I went back and read the four books again, slower this time. Then I read Midnight Sun for the second time, along with Twilight (this would be the third reading now) so I could cross reference and find out exactly what Edward and Bella were thinking at the same time.

If all of this sounds a little bit obsessed, let me come out to say that I am perhaps the person who’s astonished by this the most, because before this, I had never been a fan of anyone or anything. I don’t have a favorite actor or actress, no favorite sports team, composer, band, or even a fashion brand. I don't swoon, ever! I used to wonder if there was anything wrong with me. The funny thing is, I didn’t like Robert Pattinson as Cedric at all in Harry Potter. I thought he wasn’t handsome enough for the role. Then when twilight came out, his pictures were all over the place, on the red carpet, at awards ceremonies. I still didn’t think he was good looking at all. But when I saw him as the brooding, pale vampire, everything changed. In interviews, he’s funny and self-deprecating, which is always attractive in a guy. As if that weren’t enough, he’s also musically talented. He plays the piano and guitar beautifully, and has a really soulful singing voice. AND he wrote and sang two of the songs in the movie. Now that is HOT. I never used to understand the screaming fans or the people who wait for hours just to get a glimpse of their favorite star. Now I can sort of see it. I’m absolutely positive that I’ll still be too mortified to join the throngs of teenagers to wait for Rob Pattinson on location, but I am pretty sure I’d be tempted to enter a silent auction to win a chance to be serenaded by him on the piano. If only I could get that as a birthday present, hmmm

For the record, I am not the only mature, intelligent woman to be swoon by Edward. In fact, all my friends who are already Twilight fans are all medical professionals, almost all happily married. Of course the husbands don’t understand how we could be so wrapped up in the make-believe world of vampires and werewolves, and the books are meant for teens for crying out loud! But my friend C summed it nicely when she said that it was like crack, you just can’t help yourself. And she is exactly right.

Wednesday, September 17, 2008

So you think you want to be a photojournalist?

Last month while having lunch, a friend casually asked me whether I signed up for the photography workshop at the American Club. She said that it would be conducted by a famous National Geographic photographer and that it consisted of five days of photo-taking and critique sessions. Even though she couldn’t remember the name of the photographer, I knew I wanted to sign up instantly.

I have been shooting for a few years now, both as a hobby and as a free-lance food photographer, but I have never had any formal training in photography and it would be a great opportunity to have a professional critique and evaluate my photos. It would also give me some incentives to go out and shoot more. Ever since moving to Singapore, my photographic subjects had dwindled down to food and my dogs only. Don’t get me wrong, I love shooting food, and the income that comes with it, but I miss the days when I would just grab my camera and go out and shoot anything that captures my attention. I blame it on the hot and humid weather in Singapore, but I also know that’s not the only reason. In short, I needed to be inspired, and what better way than to spend five days with an award winning photographer from National Geographic?

That photographer turned out to be Michael Yamashita. He is every amateur photographer’s dream come true, for he, just like you and me, is entirely self-taught, and managed to turn his passion for photography and travel into a successful career. Singapore is actually where it all started, where he did a photo campaign for Singapore Airline in the 1970’s. That portfolio led to his first assignment with National Geographic, and the rest, like they say, is history.

Day 1
During the workshop, we were asked to choose a subject and shoot it over the course of several days, until we’re satisfied with what we have. I first chose the Botanic Garden because I know the place well and it’s easy for me to go back everyday to shoot. After one afternoon of shooting, however, I decided that the subject is too similar to what I’ve always been doing, namely, landscape and detailed shots of flowers and leaves. I wanted to take this opportunity to push myself, to do something entirely different, but the question is what?

Day 2
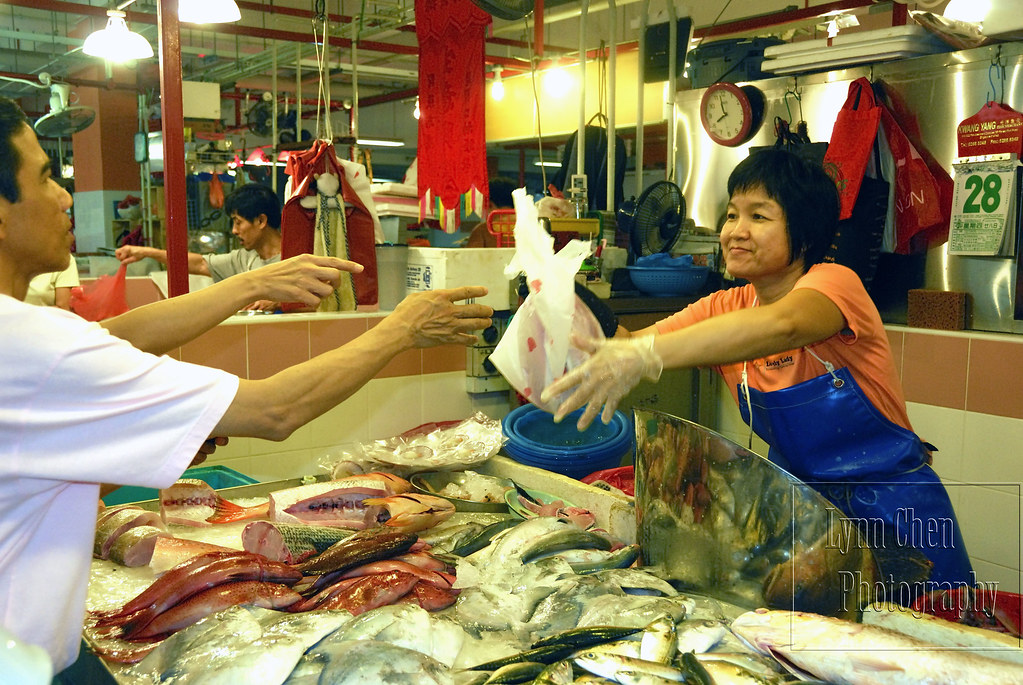
We met in Chinatown Complex at 7am to shoot the market scene. I tagged along Michael and got some pointers. He said in a busy market place, a corner stall is always a good place to position yourself, because it’s open on two sides, and you get a better view of what’s going on. So I chose a fish stall on a corner where the fishmonger is a friendly woman with a pleasant face. I waited, and watched her chopping up fish after fish after fish. Finally, she’s done and was ready to hand over the fish to the customer. I clicked away until I got the shot I wanted: transaction at a fish stall. This process is what Michael calls setting up a scene and waiting for the right moment to happen.

Michael says you should always place the person in his/her own environment, so it’s important here to show lots of fish in the foreground and also some background of the fish stall.

Later I also took this photo of a man showing me his live fish.


A very important lesson I learned on that day is that you need to have patience and be ready with your camera when the right “moment” occurs. People will be nervous and shy away when they see you with a big camera pointed to their face, but if you just stayed and watched, they’ll eventually get used to your presence and go back to doing their own stuff. After a while, they’ll forget that you’re even there. That’s when you can catch them at their most natural and relaxed state.

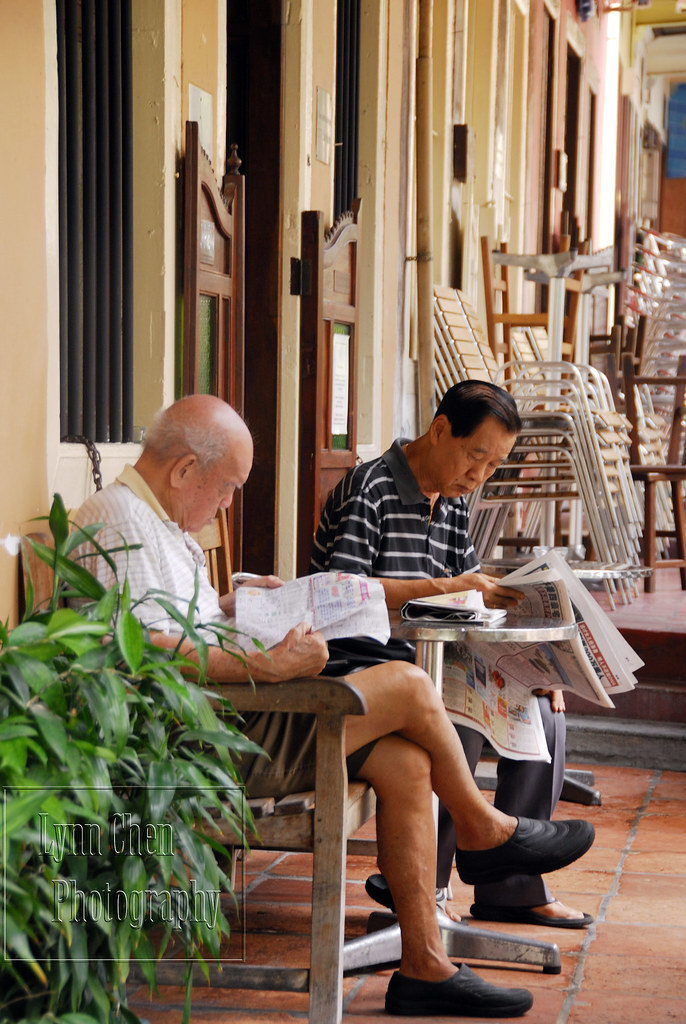
I changed my subject from the Botanic Gardens to Orchard Rd, so that I can have more opportunities to shoot people. I went to Emerald Hill off Orchard Rd in the afternoon to shoot some shop houses and caught two old men reading newspapers in front of a store and two students walking by. Nothing too spectacular, but I didn’t run away when one of the old men started eyeing me suspiciously and instead stayed and kept on clicking.


Day 3

Went to the critique session in the morning but didn’t shoot in the afternoon because I had out of town guests.

Day 4

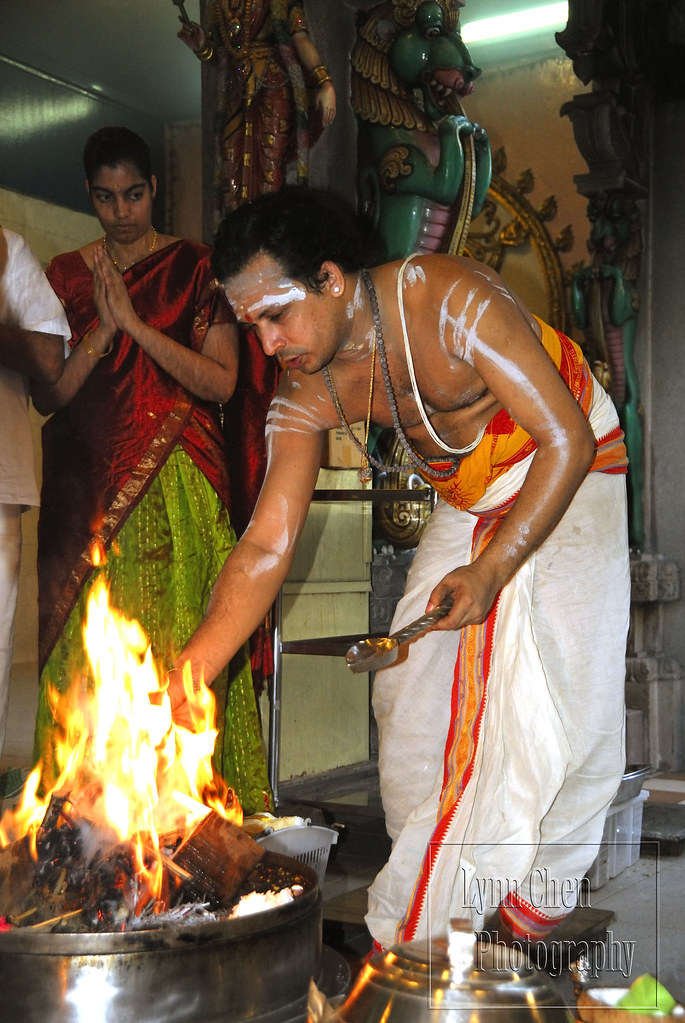
7am We met up again on a group shoot in Little India. There was a religious ceremony taking place in the temple so everyone got down on the floor and clicked away. I was so surprised that hardly anybody paid us any attention at all and carried on with their daily routine. The day before we talked about using fill flash to bring out the details so I tried it out here. Because in food photography you never use flash, it is one of my weakest points, and I don’t even own an external strobe, both because I don’t need it and because it’s added weight, but I’m beginning to see that a little bit of flash can make a huge difference in a photo. Not only can it highlight details it can also freeze certain parts of the photo while allowing other parts to be blurry in a low light situation. I don’t have an example of this later use of strobe but another member took some excellent shots using this technique.

Here in Little India, I am again overwhelmed by how friendly people are. Most people smiled and waved at us when they saw our cameras.

Some indulged us in our request and others gave a shy smile when they realized I had stolen a shot of a private moment:

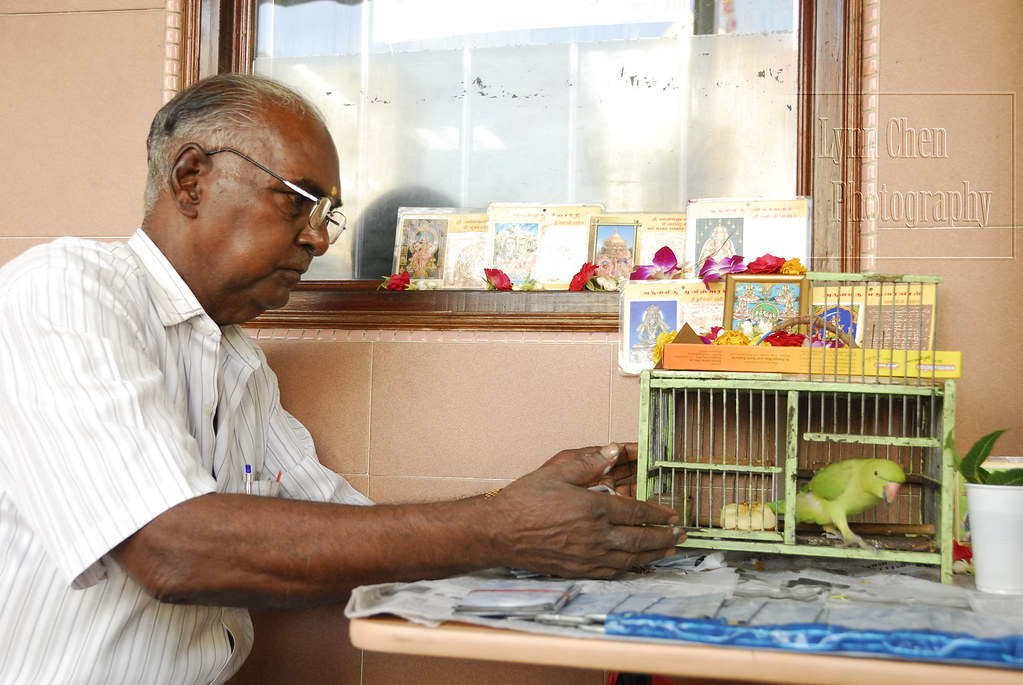
One cheeky old man tried to rip us off though when we gave him some money to take photos of his parrot:
We spent quite some time with the old man and his parrot. I first shot the man sitting with the parrot in the cage. Then when we found out the parrot is the one picking out the fortune I decided to focus on the old man’s hand and the parrot when it chooses the fortune. The two best shots are posted above. This is what Michael calls “anticipate to a point, shoot lots, and hope you get it.”

In the afternoon I went back to Orchard Rd again, in the pouring rain. When it rains there’s a lot of reflection and people running, so potentially it can be very rewarding. Unfortunately for me, I couldn’t find anywhere to stand without getting wet and wasn’t very good at balancing my umbrella so I didn’t get any good shots in the rain.

When the rain stopped, I again found myself in Emerald Hill. This time, I was in the midst of the Hungry Ghost festival. In the back of a row of shop houses, people were burning paper to pay respect to the ghosts. I lurked around for more than half an hour, getting myself and my poor camera covered in soot, and finally got one good shot.

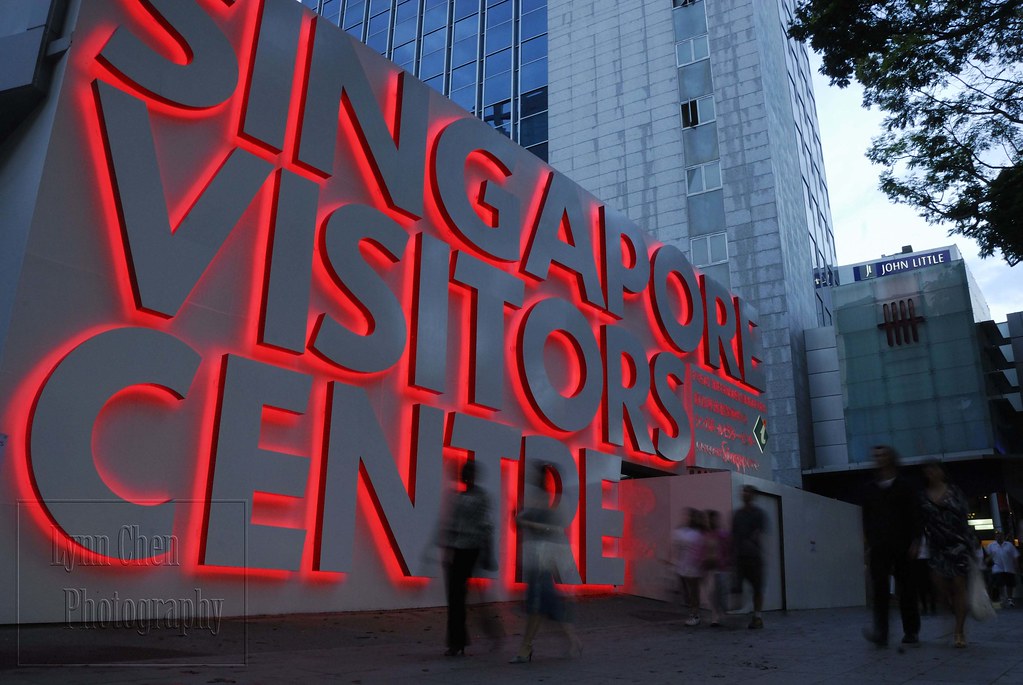
The first time I went to shoot on Orchard Rd, I wanted to get a photo of people walking in front of the Visitor’s Center but the light was too bright at that time, resulting in a huge white space behind the UOB building. I had wanted to go back again at a later time and shoot a night scene. As Michael says, when shooting night images, it’s better to have some ambient light. That way you don’t end up with a huge dead space of blackness. So today the light was right, but I still couldn’t get a satisfactory shot. I guess some photos are better in your mind’s eye.

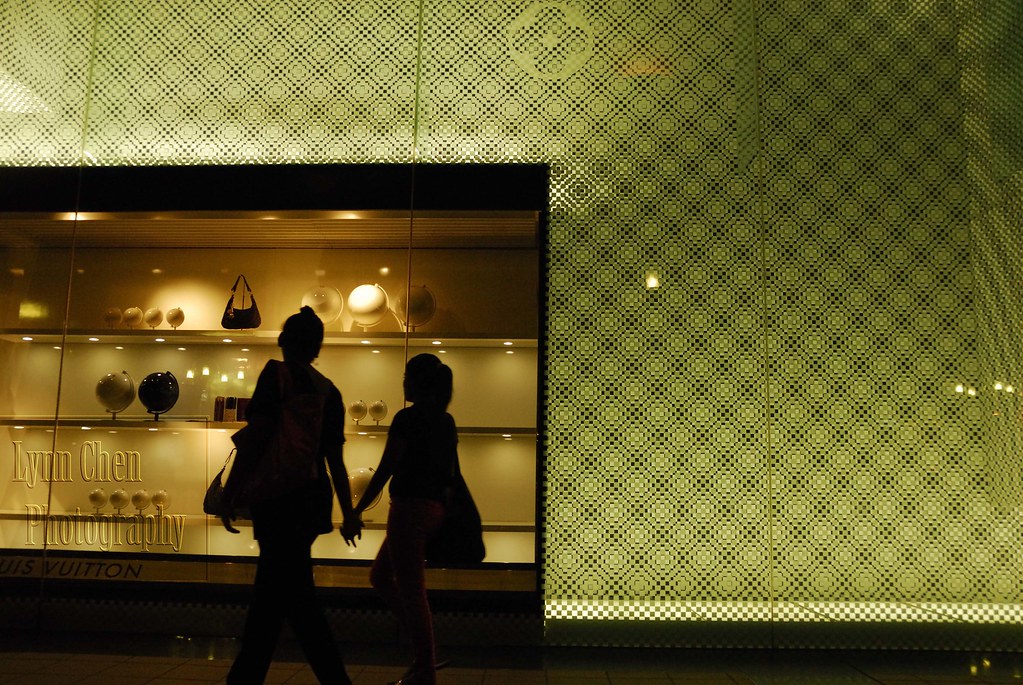
On the way back home I passed by Louis Vuitton and visualized a shot of one or two shoppers walking in front of the window display. I wanted a clear silhouette instead of a motion blur because I thought it would go better with the clean LV graphic display. As Michael says, “ Choose the light, choose the background, and wait for the moment.” This proved to be easier said than done because on a Friday evening, there were way too many people walking past the window so it was almost impossible to isolate just two pedestrians. Also, Michael said that silhouettes should be clean, which means no missing limbs and everything had to be clearly defined. After about 15 minutes of crouching with camera held up, I decided to give myself a break and put it on a tripod. Another 20 minutes later, I gave up and made a mental note to come back another time when the foot traffic is lighter. This is another lesson I learned: it sometimes take a scouting shoot to get the photo you want. Anyway, this is the best out of the more than 30 minutes of shooting. I wanted the people to be in front of the graphic part of the space, instead of in front of the window display, but it just didn’t happen on that day.

Day 5 - Final day of the workshop.

Today we’re putting together a slide show consisting of photos we took during the five-day workshop. Despite my strong desire to sleep in, I dragged myself out of bed to go back to Orchard Rd one last time to see if I can find any good photo ops. Have you ever been to Orchard Rd at 7 o’clock on a Sunday morning? I’ve never seen the place so empty. The night before I was complaining about crowds, but now I couldn’t find a single person to shoot except for street sweepers and buses, so I settled for that and practiced panning. Here’s a bus speeding down Orchard Rd, with Ngee Ann City in the background.

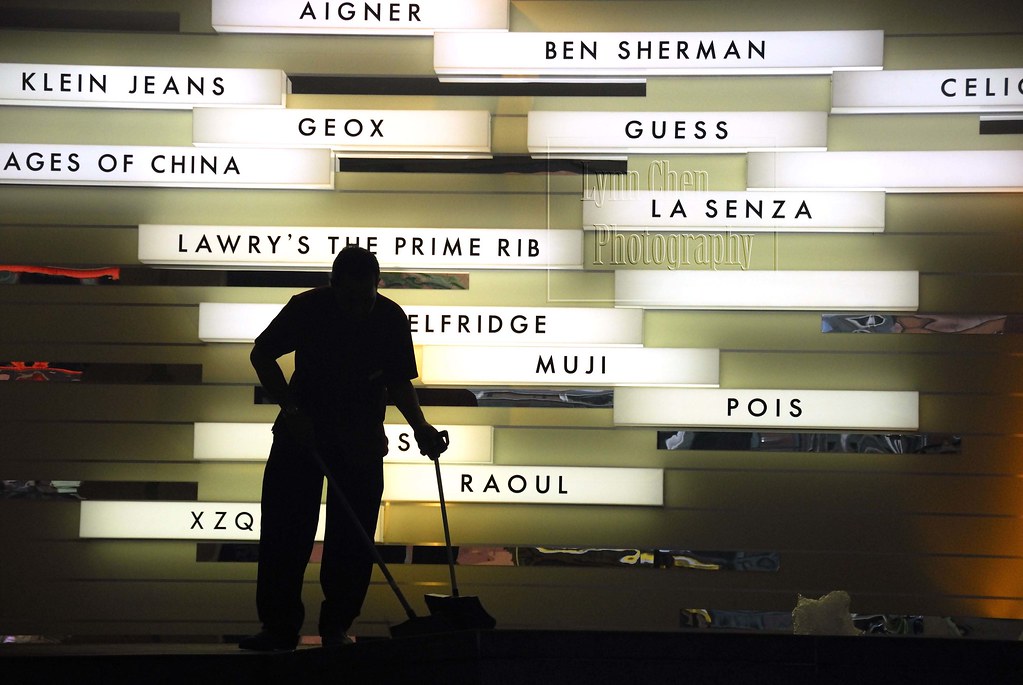
After an hour of non-action, I went to have some coffee and kaya toast in Paragon and when I walked out, I noticed a lit up sign that would make a good background. So I sat myself down on a bench on the sidewalk and waited for someone to walk down the steps in front of the sign. I waited and waited and waited, but nobody walked by. I finally found hope when I saw a cleaner sweeping the steps and got my camera ready, but he kept on missing the steps in front of the sign. After what seemed like ages, he finally came into my frame and started sweeping the steps, but he was done in less than five seconds and I only got two frames. His limbs are visible but it’s hard to see what he’s doing. There will be another re-shoot at this location, I know.

By now, I was thoroughly exhausted after four days of workshop and shooting, involving getting up at 6am on three of the days and juggling out of town visitors in between. My legs are numb from crouching for so long, my feet are hurting from walking, and my fingers are starting to cramp up from holding the camera. I’m slowly starting to realize that maybe I’m not cut out to be a photojournalist. On top of that there was the issue of food. I had never eaten so much in my life! Somehow, getting up at 6am tricks my body into thinking that I need two breakfasts. So I eat one after the photo shoot and another one when we get back to the American Club. It doesn’t help that the club has been plying us with a changing menu of warm baked goods and fresh fruits everyday. In addition to the double breakfasts, I also find myself eating more snacks throughout the day: when I needed a break from the shooting, when I’m waiting for the light to change, etc. All this walking around and holding a heavy DSLR had better be burning up lots of calories or I’ll become overweight before I ever have even a glimpse of hope of becoming a photojournalist.

Despite the danger of turning into a whale with severe arthritis and sleep deprivation, I thoroughly enjoyed the workshop. For almost three straight days after the workshop, I found myself looking at my surroundings and seeing potential photos everywhere. Out of all the photos I shot for the workshop, my all time favorite is one that I took on my second day of shooting. The background is something I see everyday: a colorful poster plastered all over Orchard Road to cover up unsightly construction that’s taking place. Armed with my newly heightened sense for detecting photo ops, a spark went off when I saw it again that day. I decided to take a photo of someone walking in front of the poster. Preferably that someone would be slightly out of place among the glamorous women of Amazonian proportion depicted in the poster. I was waiting for an auntie or uncle in flip flops, but got something even better:

When I saw him I knew he was my guy: a little bit clueless, in a little bit of a daze, and just a little bit out of place. The only question is, will his stride and position be lined up with the women in the poster, and they did!

So here it is: choose your background, choose your light, wait for a moment that’s special, keep on clicking, and hope you have it.

And one last thing: only check your LCD once to make sure you have the right exposure, otherwise, don’t look at the photos you’ve taken until you’re home. Because whatever you’ve taken, you already have it. While you’re checking the images that you already have, you could be missing precious images that you could be shooting. If there’s one thing I learned and will never forget in this workshop, this is it.