Showing posts with label kimono. Show all posts

Friday, March 04, 2005

10' 40"

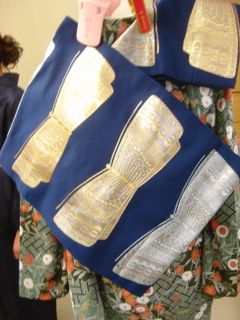
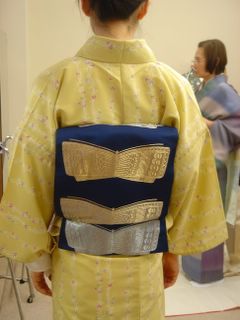
I did a practice run for my kitsuke test next week and clocked in at 10 minutes and 40 seconds to put on my kimono and tie the obi into this.


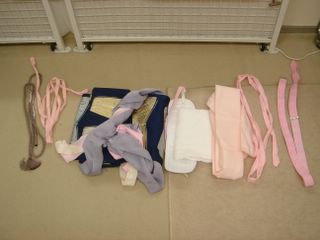
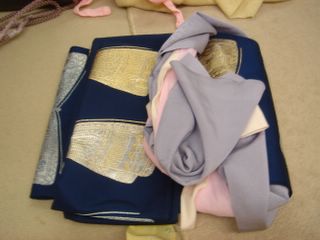
I am allowed to do all the prep work first, before the timer is started, such as setting up the obi and laying out all the necessary strings and whatnot in the order they will be used.


My sensei said 10 minutes and 40 seconds is good for a first try. I just need to shave off that 40 seconds for the test, some how. AND, when I go on to the next level, I have to be able to do this in five minutes. Yeah, right!

Friday, February 25, 2005

Three-month Long Kimono Break

Hello, my name is Lynn, and it’s been three months since I last made it to kitsuke lesson (Kitsuke・着付け means the act of putting on a kimono).

I stepped sheepishly into the classroom, and was immediately greeted by Takamoto sensei’s warm hello. As you recall, she’s the one who used me as a mannequin to practice her very own kitsuke.

A round of greeting and catching up later, we got down to business. First, I had to put on my own kimono, as we do at the beginning of every lesson, even though today I won’t be tying the obi on myself. It was comforting to know that after three months I haven’t completely forgotten the basics. I did forget, however, how to tie the Otaiko・お太鼓 (translation: big drum, the most commonly seen boxy looking knot worn by married women). So I reviewed that too.

Next up, today’s obimusubi (帯結び・obi knot): Tateya (立て矢: vertical arrow) and Hirosue Tateya (広末立て矢: vertical arrow with a fanned out end). Hirosue Tateya or some of its variations are the most commonly used obi knots by brides on their wedding day after changing out of their white wedding kimono. You can also see them on young girls on Coming of Age Day (成人の日). In short, it’s a knot used on festive occasions, and this is what Hirosue Tateya (the more elaborate of the two) looks like.
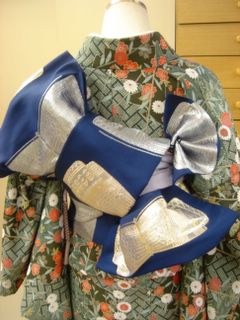


Not particularly pretty if you ask me. Or maybe I am biased because it was a pain in the you-know-what to tie the darn knot. Because it is slanted, the balance is extremely important, and the rule of 1/3 is strictly followed every step of the way. One has to ensure that the bottom “wing” is not too large; and that the angle is just such. A special pillow (one that rotates) and a string with three elastic loops were used. When making the two “wings” of the knot, three clips were engaged to hold the yards of fabric in place; it was also a time one wished one had an extra hand. Thank goodness I was using my practice obi made out of polyester, which was relatively light. I couldn’t even begin to imagine tying a heavy, elaborately adorned silk obi into this knot.


While I was struggling with the darned “Vertical Arrow” a classmate of mine made this pretty knot, called Beni Tsubaki (red camellia). See flower on the left.
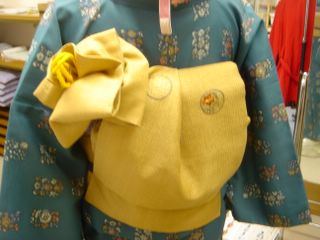


Now, isn’t this so much better looking than the Tateya? Can you see how the Tateya differs from Hirosue Tateya?


Yup, it’s missing the little fan shaped end on the upper right corner.

Next week, I start reviewing all the knots I learned in the practical lessons. Then it’s time for the test: putting on a kimono and tying the Otaiko knot on myself in less than ten minutes. I definitely need lots of practice to pass this test.
Friday, October 22, 2004

Am a geisha/maiko


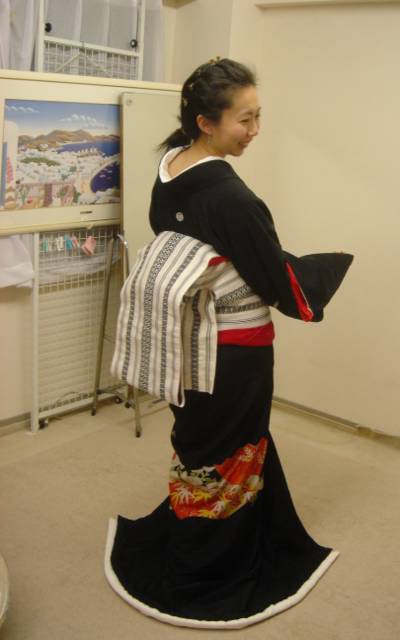
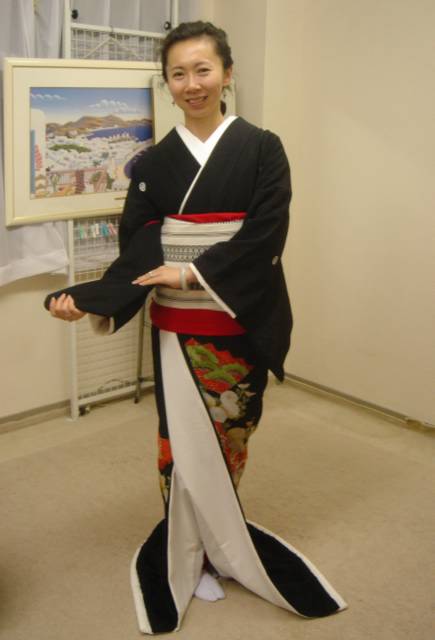
When I stepped into my kimono lesson (kitsuke is the correct Japanese term), I was greeted by the teacher with a cheery "Lynn-chan, can you be my model for period costume (jidai ishou)?" Ever the adventurer, I said yes happily. Turns out my teacher (sensei) is teaching an advanced level kitsuke lesson to a group of students aspiring to be kitsuke masters (professor is the term used), and she needs to practice on someone beforehand. So for the next hour I pateintly held out my arms at my side while sensei and her assistant frantically worked around me. After putting on a underrobe, first they had to put some padding on me, one draped in front of my chest, and three in the back, to give me a perky butt (sensei's words exactly). Then comes the second layer, called nagajuban. This layer is usually made of silk of a subdued color like ivory and pink, but for jidai ishou, the skirt and the sleeves are a luxurious red silk. The back of the collar is pulled way low to expose a good portion of the neck. Now comes the real thing. The beautiful black kimono with colorful drawings near the bottom hem. This kimon differs from the modern day ones in that it's longer and slimmer. Around the opening of the collar, sleeves and the bottom hem, a padded layer of white silk edge is attached. The front hem is pulled open and secured so a triangle of the bright red under skirt peaks out. From there on, the real torture started. A long piece of red silk fabric (maybe 10m?? they sure tied it around me a million times) was wrapped around me from just below my hip bone to reach my armpit. I imagine that's how mummy would feel, if they could feel. We're not quite done yet though. On top of this comes the obi. I think the particular pattern was called "yanagi" but I am not sure, as I was focusing all my concentration on breathing. Anyway, with the obi came more tying of strings, etc. etc. But I must say the end result was pretty impressive, although I could neither walk nor sit and I had no idea what to do with my hands. Mind you, I have worn kimonos before, but this is an entirely different league. Hats off to the petite Maiko-sans who have to drag all this fabric around while entertaining guests! Phew, now I am tired just writing about it.